Learn how to make a perfectly buttery, flaky pie crust from scratch using this in-depth tutorial and video. This page includes all of my best success tips, lots of step-by-step photos, and a thoroughly detailed recipe. Millions of readers have been using this helpful guide since 2015. Master this crust recipe and the rest will be as easy as… eating salted caramel apple pie!
For a baker, there’s nothing more satisfying than making a pie completely from scratch. Pies are often made for special occasions, and there’s a good reason for that: they’re time consuming. This shouldn’t scare you! It should intrigue you. If you’ve ever felt intimidated about making homemade pie crust, I’m here to walk you through it and cheer you on. If I can do this, you can do this.
Pie crust is the foundation for so many delicious desserts (plus savory pies and quiche), so once you build up your confidence in making a crust, you’re opening a door to an entire baking category. And that’s exciting! Whether your favorite pie filling is apple pie or creamy banana cream pie, or even eggs & cheese, the success of the overall pie can really hinge on the quality of the crust.
You wouldn’t hang a beautiful piece of art or favorite photo in a terrible frame, right?
Today I’m teaching you everything about making a buttery, flaky pie crust. This is my absolute favorite pie crust recipe and one of the most popular recipes on this website.
With all the recipe testing that goes into publishing the many pie recipes on this website and in my cookbooks, plus my annual Pie Week, it’s not an understatement to say that I have made a LOT of pies. Along the way, I’ve learned what works and what doesn’t, and I’m happy to share it all with you.
I use BOTH shortening and butter in this pie crust because they work together to make the BEST crust. Buttery, flaky, and tender: the pie-fect trifecta.
Both crusts taste buttery and flaky. But overall, this butter-and-shortening crust wins in terms of texture and flavor; AND, if you follow the pie crust recipe carefully, it holds shape too.
Easy All-Butter Flaky Pie Crust
This pie crust recipe makes consistent dough and makes dough that’s a dream to roll out. Using a food processor in this recipe eliminates variability. If you have one, use it. With that said, you can do this method by hand. Directions are provided below for using a processor and by hand.
Prep: 1h15min
Total: 1h15min
Yield: Enough for one 9-inch double crust pie
Serving Size: 1/8 of dough
Nutrition Facts: servingSize 1/8 of dough, calories 345, Protein 4 g, Carbohydrate 30 g, Fiber 1 g, Sugar 0 g, Fat 23 g, Saturated Fat 15 g, Cholesterol 61 mg
Ingredients:
- 2 ½ cups (325 grams) all-purpose flour
- 1 teaspoon kosher salt or use 1/2 teaspoon fine sea salt
- 1 tablespoon sugar, optional
- 1 cup (230 grams) very cold unsalted butter, cut into 1/2-inch cubes (2 sticks)
- 4 to 8 tablespoons ice water
Instruction:
- Add 1 ½ cups flour, salt, and sugar (optional) to a food processor. Pulse 2 to 3 times until combined. The remaining cup of flour will be added later.
- Scatter butter cubes over flour and process until a dough or paste begins to form, about 15 seconds. (There should be no uncoated flour).
- Scrape bowl, redistribute the flour-butter mixture then add remaining 1 cup of flour. Pulse 4 to 5 times until flour is evenly distributed. (Dough should look broken up and a little crumbly).
- Transfer to a medium bowl then sprinkle ice water over mixture — start with 4 tablespoons and add from there. Using a rubber spatula, press the dough into itself. The crumbs should begin to form larger clusters. If you pinch some of the dough and it holds together, it’s ready. If the dough falls apart, add 2 to 4 more tablespoons of water and continue to press until dough comes together.
- Remove dough from bowl and place in a mound on a clean surface. Work the dough just enough to form a ball. Cut the ball in half then form each half into discs. Wrap each disc with plastic wrap and refrigerate for at least 1 hour and up to 2 days. You can also freeze it for up to 3 months (just thaw it overnight in the fridge before using it).
- Add 1 1/2 cups flour, salt and sugar (optional) to a medium bowl. Stir 2 to 3 times until combined.
- Scatter butter cubes over flour and mix briefly with a fork or spatula to coat the butter with flour.
- Cut the butter into the flour with a pastry blender, working mixture until the flour has a coarse, mealy texture similar to fresh bread crumbs. About 1 – 2 minutes.
- Add remaining 1 cup of flour. Work butter and flour with the pastry blender until flour is evenly distributed. About 20 seconds. (Dough should look crumbly with pea-sized pieces).
- Sprinkle ice water over the mixture — start with 4 tablespoons and add from there. Using a rubber spatula, press the dough into itself. The crumbs should begin to form larger clusters. If you pinch some of the dough and it holds together, it’s ready. If the dough falls apart, add 2 to 4 more tablespoons of water and continue to press until dough comes together.
- Remove dough from bowl and place in a mound on a clean surface. Work the dough just enough to form a ball. Cut ball in half then form each half into discs. Wrap each disc with plastic wrap and refrigerate at least 1 hour, and up to 2 days. You can also freeze it for up to 3 months (just thaw it overnight in the fridge before using).
- Remove one of the dough discs from the refrigerator and let sit at room temperature for 5 minutes.
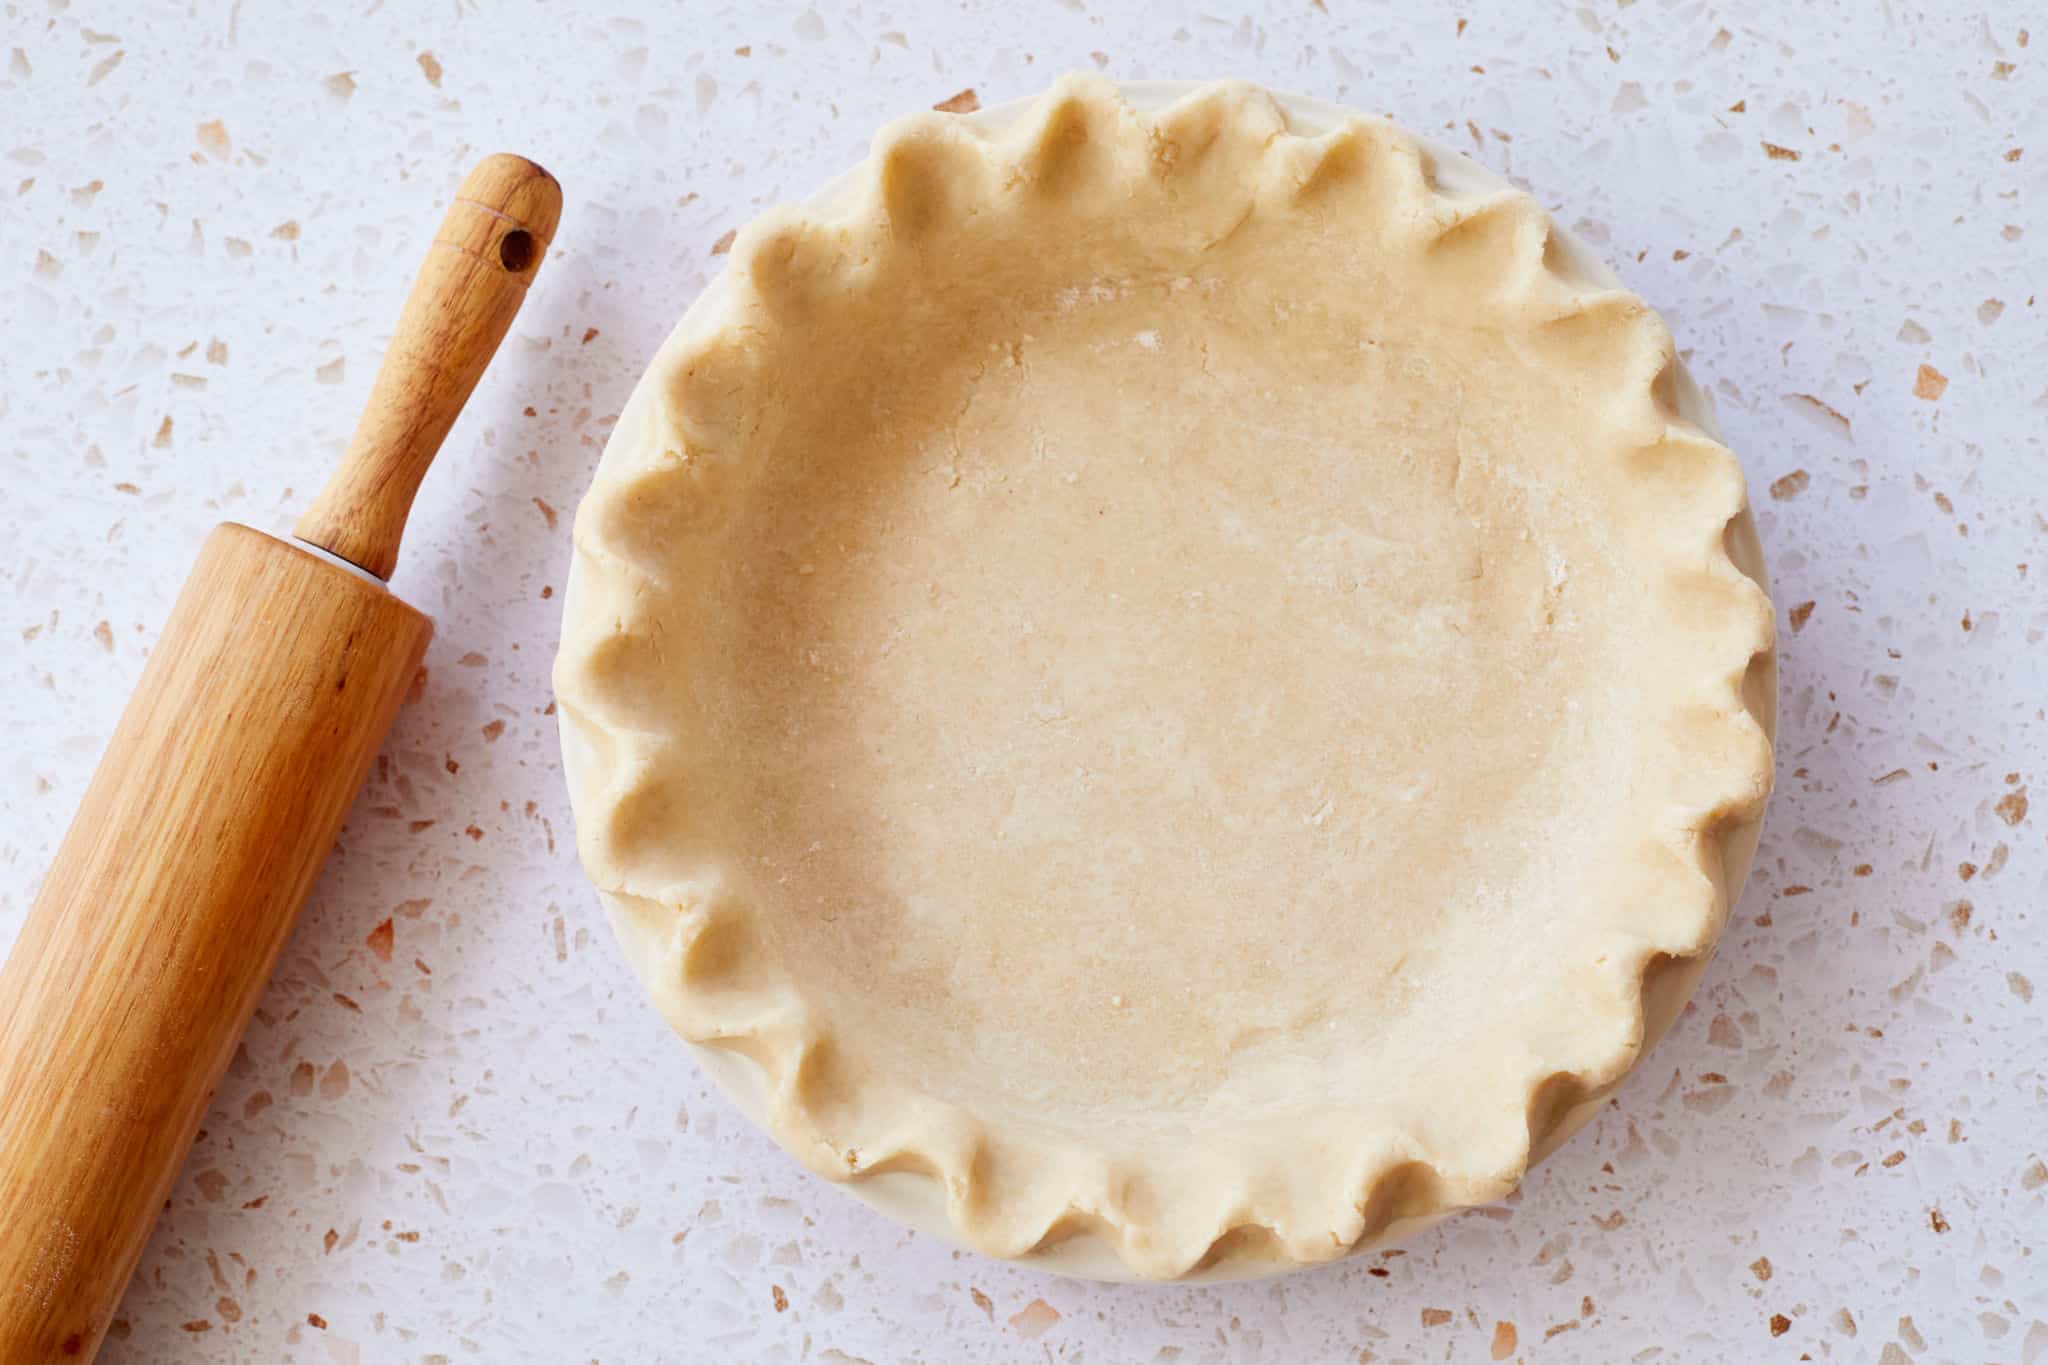
- Lightly flour work surface, top of dough and rolling pin. Then use rolling pin to roll out dough to a 12-inch circle (about 1/8-inch thick). Be sure to check if the dough is sticking to the surface below — add a small amount of flour when necessary.
- Check for size by inverting pie dish over dough round. Look for a 1-inch edge around the pie dish. To transfer dough to dish, starting at one end, roll dough around rolling pin then unroll over dish.
- Gently press dough down into dish so that it lines the bottom and sides of the dish. (Be careful not to pull or stretch the dough). Then, use a knife or pair of kitchen scissors to trim dough to within 1/2-inch of the edge of the dish.
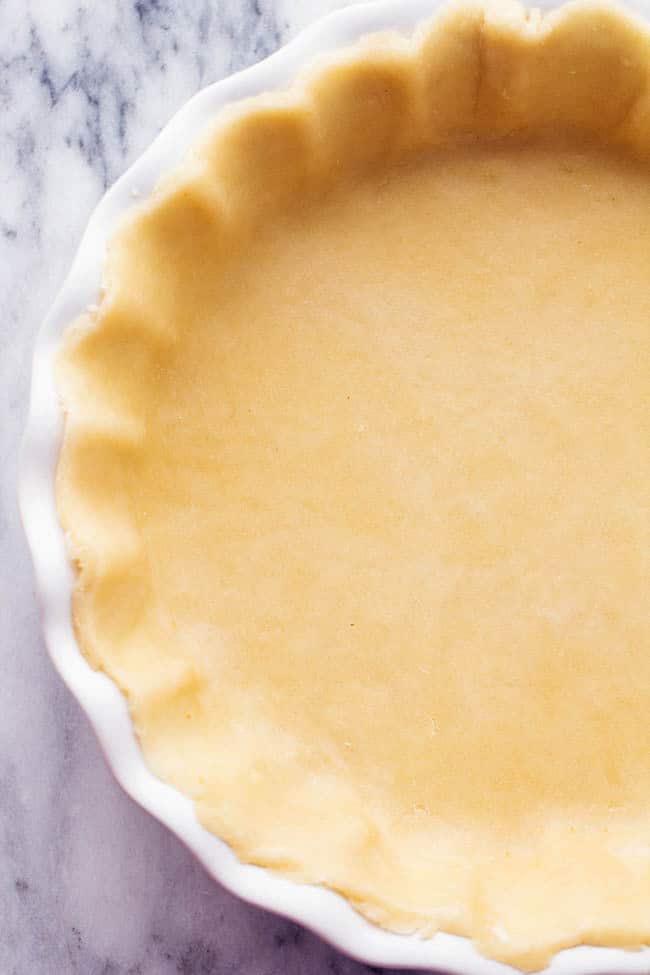
- Fold edge of dough underneath itself so that it creates a thicker, 1/4-inch border that rests on the lip of the dish. Then, crimp edges by pressing the pointer finger of one hand against the edge of the dough from the inside of the dish while gently pressing with two knuckles of the other hand from the outside. Refrigerate dough at least 20 minutes or freeze for 5 minutes before baking.
- If making a double crust pie, do not crimp edges yet. Roll out second dough disc, fill pie then top with second dough round. Trim the edges then crimp.
- Heat the oven to 425 degrees F. Place a baking sheet on a middle oven rack.
- Roll out enough dough to make one 9-inch crust (1 dough disk). Place into a pie plate and then pierce the bottom of the crust with a fork (this prevent air pockets or bubbles from forming while baking). Line the crust with two sheets of aluminum foil or parchment paper. (Be sure to push foil against the edges of the crust). Then, fill foil with dried rice, dried beans or pie weights. Refrigerate 30 minutes or freeze for 10 minutes, or until firm to the touch.
- Place pie crust onto preheated baking sheet and reduce oven temperature to 400 degrees F. Bake 20 to 30 minutes or until the crust is golden.
- Make an egg wash by whisking one egg yolk and 1 tablespoon of cream in a small bowl. Then, remove rice, beans or pie weights and foil from pie crust. Brush the bottom and sides of the crust with egg wash. Bake until egg wash is dry and shiny, 3 to 5 minutes. Cool crust completely before filling.
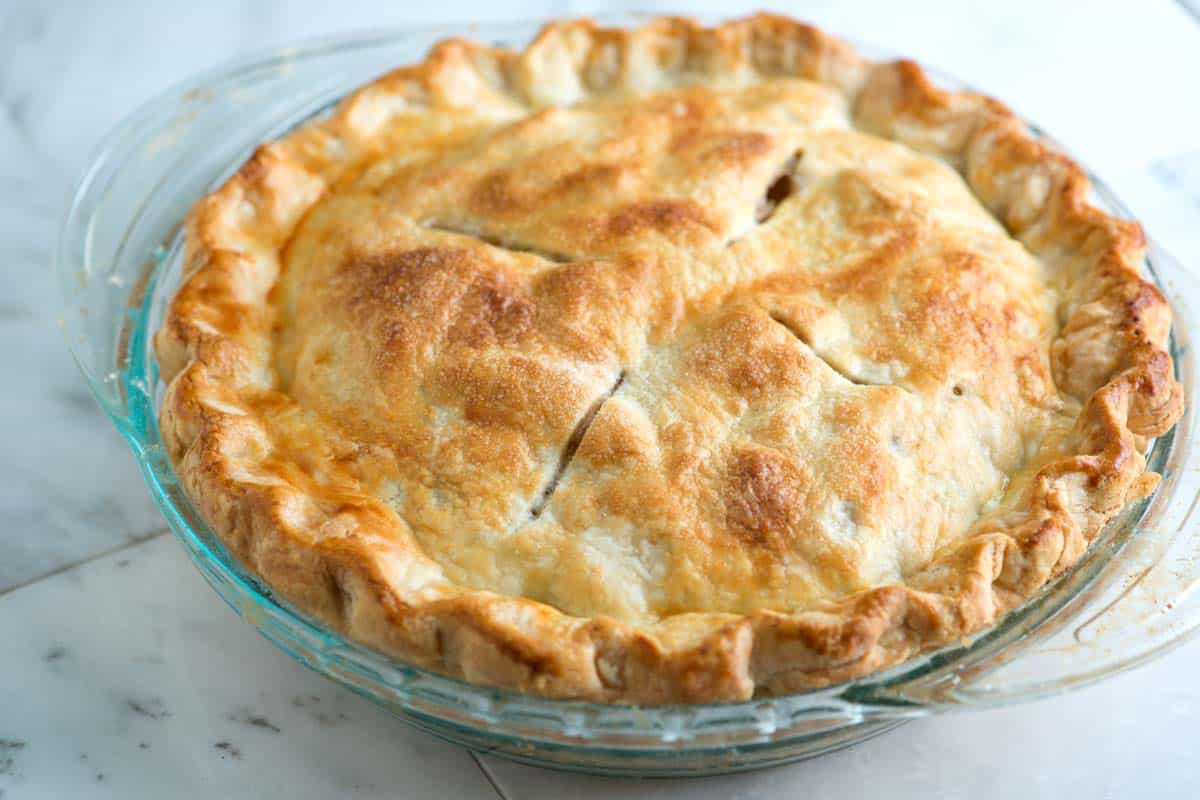
- Oven temperature and bake time for double crust pies will vary depending on the pie recipe you plan to follow. As an example, we set our oven to 400 degrees Fahrenheit for our double crust cherry pie (see the recipe here).
- Remove half of dough from refrigerator and let sit at room temperature for 5 minutes. On a lightly floured surface, roll out dough to a 13-inch (1/8-inch thick) circle.
- Check for size by inverting pie dish over dough round. Look for a 1-inch edge around the pie dish. Carefully press the dough into the dish. Spoon the pie filling into pie crust.
- Roll out second half of dough then top pie. Use a knife or pair of kitchen scissors to trim dough to within 3/4-inch of the edge of the dish.
- Fold edges of top crust underneath edges of bottom crust, pressing the edge to seal it so that it creates a thicker, 1/4-inch border that rests on the lip of the dish. Then, crimp edges by pressing the pointer finger of one hand against the edge of the dough from the inside of the dish while gently pressing with two knuckles of the other hand from the outside. Refrigerate pie at least 20 minutes or freeze for 5 minutes before baking.
- Just before baking, make egg wash by whisking egg yolk and cream together in a small bowl. Use a pastry brush to brush over the top crust. Then, sprinkle with 1 tablespoon of sugar. Then, cut 3 to 4 slits in top of pie. Bake as directed by the specific recipe you are following.
Homemade Buttery Flaky Pie Crust Recipe

This recipe is enough for a double crust pie. If you only need 1 crust for your pie, freeze the other half per the Freezing Instructions below. Is your pie dough tearing, cracking, or crumbling as you try to roll it out? See recipe Notes.
Prep: 15min
Total: 2h15min
Yield: 2
Ingredients:
- 2 and 1/2 cups (315g) all-purpose flour (spoon & leveled), plus more for shaping and rolling
- 1 teaspoon salt
- 6 Tablespoons (90g) unsalted butter, chilled and cubed
- 2/3 cup (130g) vegetable shortening, chilled
- 1/2 cup (120ml) ice cold water
Instruction:
- Whisk the flour and salt together in a large bowl.
- Add the butter and shortening. Using a pastry cutter or two forks, cut the butter and shortening into the mixture until it resembles coarse meal (pea-sized bits with a few larger bits of fat is OK). In this step, you’re only breaking up the cold fat into tiny little flour-coated pieces; you’re not completely incorporating it. Do not overwork the ingredients.
- Measure 1/2 cup (120ml) of water in a cup. Add ice. Stir it around. From that, measure 1/2 cup (120ml) of water, since the ice has melted a bit. Drizzle the cold water in, 1 Tablespoon (15ml) at a time, and stir with a rubber spatula or wooden spoon after every Tablespoon has been added. Stop adding water when the dough begins to form large clumps. I always use about 1/2 cup of water, and need a little more in dry winter months. Do not add any more water than you need.
- Transfer the pie dough to a floured work surface. Using floured hands, fold the dough into itself until the flour is fully incorporated into the fats. The dough should come together easily and should not feel overly sticky. Avoid overworking the dough. If it feels a bit too dry or crumbly, dip your fingers in the ice water and then continue bringing dough together with your hands. If it feels too sticky, sprinkle on more flour and then continue bringing dough together with your hands. Form it into a ball. Use a sharp knife to cut it in half. If it’s helpful, you should have about 1 lb, 8 ounces dough total (about 680g). Gently flatten each half into 1-inch-thick discs using your hands.
- Wrap each tightly in plastic wrap. Refrigerate for at least 2 hours and up to 5 days.
- After the dough has chilled for at least 2 hours, you can roll it out. Work with one crust at a time, keeping the other in the refrigerator until you’re ready to roll it out. Lightly flour the work surface, rolling pin, and your hands, and sprinkle a little flour on top of the dough. Use gentle-medium force with your rolling pin on the dough—don’t press down too hard on the dough; you’re not mad at it! When rolling dough out, start from the center and work your way out in all directions, turning the dough with your hands as you go. Between passes of the rolling pin, rotate the pie crust and even flip it, to make sure it’s not sticking to your work surface. Sprinkle on a little more flour if it’s sticking; don’t be afraid to use a little more flour. If you notice the dough becoming a lopsided circle as you’re rolling it out, put down the rolling pin and use your hands to help mold the dough back into an even circle. Roll the dough into a very thin 12-inch circle, which is the perfect size to fit a 9-inch pie dish. Your pie dough will be about 1/8 inch thick, which is quite thin. Visible specks of butter and fat in the dough are perfectly normal and expected.
- Because your dough is so thin, use your rolling pin to help transfer the pie crust to the pie dish. Carefully roll one end of the circle of dough gently onto the rolling pin, rolling it back towards you, slowly peeling it off the work surface as you go. Pick it up, and carefully roll it back out over the top of the pie dish. It’s helpful to watch how I do it in the video below.
- Proceed with the pie per your recipe’s instructions. If your dough requires par-baking, see helpful How to Par-Bake Pie Crust tutorial.
Grandma’s Perfect Pie Crust
My grandma knew how to make the best pies every year for Thanksgiving. The crust is tender and flaky and so easy to make! You will never buy from the store again!
Prep: 5min
Total: 5min
Yield: 8
Serving Size: 1 serving
Nutrition Facts: calories 147 kcal, Carbohydrate 15 g, Protein 2 g, Fat 9 g, Saturated Fat 2 g, Sodium 73 mg, Fiber 1 g, Sugar 1 g, servingSize 1 serving
Ingredients:
- 1 1/4 cups all purpose flour
- 1/4 teaspoon salt
- 1/3 cup shortening
- 4 to 5 Tablespoons cold water
Instruction:
- In a medium bowl stir together flour and salt. With a pastry blender cut in shortening till pea-sized.
- Sprinkle water on one tablespoon at a time tossing with a fork. Push moistened dough to the side. Mix till all flour is moistened. Don’t mix too much or the crust will be hard.
- Form into a ball and roll out on the floured surface. Turn and flour the dough a few times till it’s the size you need.
How to Make Pie Crust
FAQ
What is the secret to a good pie crust?
- Use Very Cold Butter or Fat. …
- Retain Some Chunks. …
- Limit the Water. …
- Chill the Dough. …
- Roll the Dough, Turn the Dough. …
- Think Curbs, Not Driveways. …
- Let the Dough Fall Into the Pan. …
- Chill the Lined Pie Pan.
Is pie crust better with butter or Crisco?
Should pie crust be baked or unbaked?
What is the number 2 most important thing when making pie crust?
Before you start making the dough, fill a glass with ice and water. Add the ice water gradually to the dough, about one tablespoon or so at a time, and stop when the dough is just moist enough to hold together when a handful is squeezed.
